

How To Make A Simple Leather Wallet (Free Template)
Let’s talk about leather wallets.
Small leather goods are a great place to start when learning to work with leather. Key chains, cuffs, card holders, valets.
Wallets always seem to be a little more intimidating for folks, but honestly, they don’t have to be!
We’ve got an easy to use template for you to use and a quick walkthrough to create your own wallet! Go ahead and choose between no-sew or hand stitching your wallet, depending on your skill or comfort level.
So print your template, grab your piece of leather, and let’s get started!

Here are the tools you will need to make this a no-sew wallet:
Leather (we suggest 3-5 oz semi-stiff temper. Veg Tanned works great for this)
Knife (utility or x-acto will cover it)
Mallet
Hole Punch Set or Rotary Punch
Or pick up the full kit here and get everything you need.
Here are the tools you need if you want to hand stitch your wallet:
Leather (we suggest 3-5 oz semi-stiff temper. Veg Tanned works great for this)
Knife (utility or x-acto will cover it)
Mallet
Stitching Chisel Set
Or pick up the full kit here and get everything you need.
First up, our no-sew option!

To start, lay out your leather and find the best place to lay your template. You can free hand your cut, or use a ruler to keep straight along the edges!

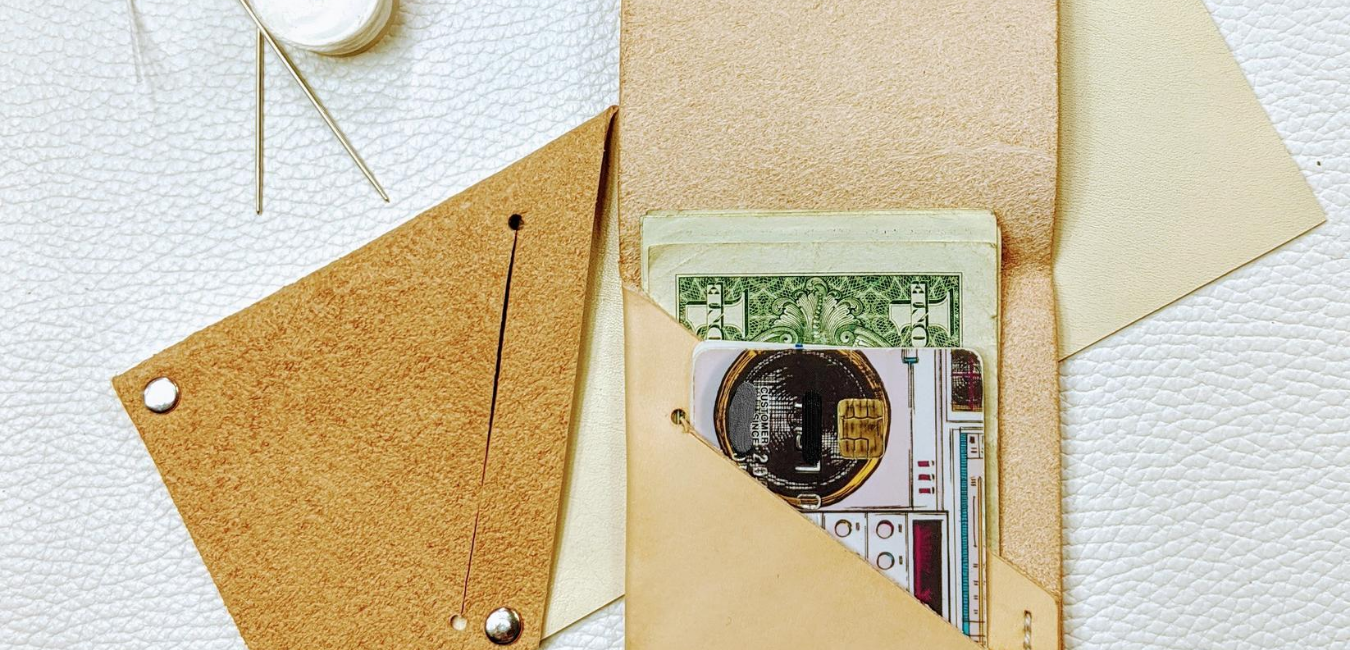
Once the body of your wallet is cut out, line the template back up, punch out your rivet holes. There will be 6 in total, three on the angled flap and three on the body of the wallet. These should line up when you fold the angled flap over.
You will also punch the two holes on either side of your card slot. Once those are punched out, you can again use the template to cut a straight line between the two of them.

You are ready to add your hardware! Get your rivets ready.
Fold over the angled flap, until all your rivet holes line up. Place your rivet posts through the holes, and add the caps.

Your leather may be a little thick or stiff and not want to sit flat. Grab a clip, and place it over the fold to help mold the leather into the bend. I would suggest putting a piece of scrap leather between the clip and your wallet to keep it from getting dinged up.
If you’re using veg tan, you can add a little water to the bend to make it more pliable and speed up the process!
When everything looks even, go ahead and set your rivets with your mallet.

Next, you’ll want to apply a thin layer of leather cement in the bottom seam. This will ensure that your cards do not slip out of the bottom! If you’d like to add it to the side seam as well, go for it!
Apply the cement to both sides of the seam, and press it firmly together. Use another clip to hold the seam tight together until it dries completely.

Once that is dry, the only thing left to do, is fold over the top flap. Again, you may need to add a clip to create a nice fold.
And there you have it,a DIY leather wallet without a stitch in sight. A quick and easy leather project, great for a beginner.
Now for the hand stitching walk through!

The first step is still the same. Take your template and cut out the body of the wallet from your leather.
Here, you will only need to punch out the two holes on either end of the card slot, and cut the slit between them with your knife and ruler.
Now, you’ll want to fold over your angled flap and line up your edges. If you need help flattening the fold, apply a clip both ends with a little scrap leather to protect the wallet.
Once your edges are lined up, start applying the cement to the inside edge of your wallet. Just a thin coat on both the top and bottom will cover it.
Press your edges back together and let the glue dry. Since you will be stitching the edge, the glue is really there to help keep your wallet in place as you chisel your stitching holes.

Once the glue is dry, use your template to help mark your stitching line. This will ensure your stitch is straight and even to the edge. Mark the line with an awl or a light pencil line. Use your ruler to help keep it straight.
Take out your stitching chisel, and start punching your stitch holes. Once you’ve got your first punch in, set the first couple teeth on the chisel in the previous holes to help keep you straight.
When you’ve punched all the way around your glued edges, grab your needles and thread and start stitching.
I find using a classic saddle stitch is best for this project. It’s relatively easy to learn, but takes some practice! Check out this video for a quick look at hoe to stitch.
Thread two needles at either end your piece of thread. Your thread should be about 20-24 inches long. Put the thread through the eye of the needle, then poke the point of the needle through the thread to knot it.
Once you’ve got both ends knotted to needles, you’ll push one needle through the first stitch hole and pull it half way through.
Take your left needle, and push it through the second stitch hole. Pull it through, then push your right needle through the exact same hole you just came through. Then do it again in the next hole and so on.
Do not switch up which side you put through first or your stitch will be uneven. If you start with the left needle, you should start every stitch with the left needle. Make sure to pull the thread tight consistently, or you could risk some bumpy or loose stitches.
Keep this stitch up until you reach the end of your stitch holes. Then you will need to back stitch to lock your stitch. Using the same process, just go backwards through your last two stitches. Try not to pierce your existing stitch, work your needle around it. This will help keep the stitch looking clean. After your two back-stitches, you can trim the thread and carefully melt the edges with a lighter for a permanent bond.
Fold over the top of your wallet and there you have it, a simple DIY wallet, ready for use!

Be sure to check out our other "How-To" blog posts for more projects!
Did you encounter a term or phrase you didn't understand? We also have our Leather 101 blog to help those that are new to leather pick up the jargon!