

How-To Make An Easy Leather Pendant Necklace
Make Your Own Leather Pendant
Making your own leather jewelry is easier than you think! Creating a simple leather pendant is very much in the same vein as making an earring, so if you are at all familiar with that process, you'll take to this very easily! If not, it's simple to pick up and you'll be a pro in no time!
Before getting started, check out the list below for the tools you'll want handy.
Tools needed for this project:
-Leather Earring Blanks (Any shape and size, can be done with single pieces or multiples for stacking)
-Jewelry Pliers
-Jump Rings
-Jewelry Chain (new or even one you have in your jewelry box)

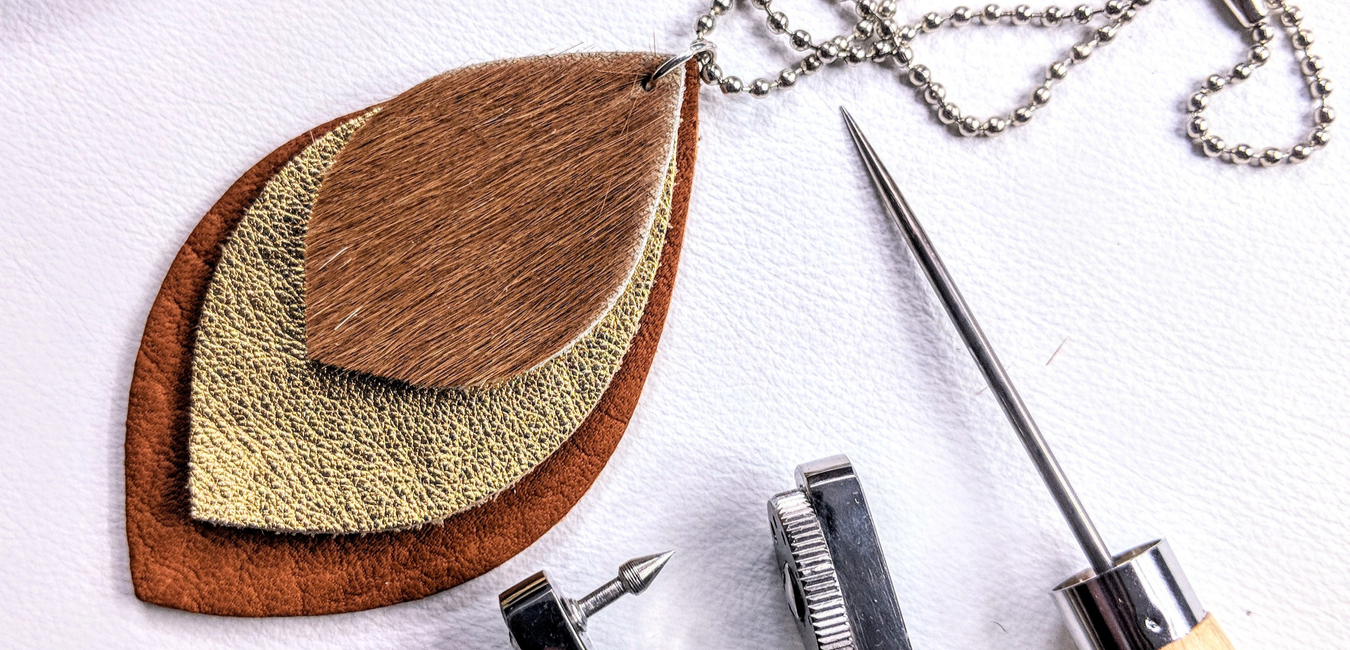
You can see from the picture above that we went with three different sizes and types of leather for our pendant. This is the small, medium, and large leaf shape. We went with all leaf shapes to make for a very clean stack. The small is hair on cowhide, the medium is our metallic Gold Dust from the Vegas Collection, and the large is a grainy chap leather. We went this route because it provides a lot of different textures, making the piece visually interesting. To balance out all the textures, we went with colors that were in the same color family. This is where the really creative piece of this project comes in because you could do this with any leather textures you love and any color combinations that are your favorite! School colors, sports team colors, comic book character colors...whatever you want! Once you've picked your colors and shapes, you can move onto making the pendant a finished piece.

If you are layering multiple pieces, you will want to get them lined up on top of each other exactly how you are going to want them to hang from your necklace. If you are doing a single piece pendant, you don't need to worry about that step! Once you have all your pieces lined up as you want them, take the scratch awl and push it through your leather stack, marking where you want to punch your hole for the jump ring.
Attempting to use the jewelry punch on several pieces at the same time can result in slipped or incomplete punches. Using the awl allows you to make a clear demarcation for where you will want to put your punches. Be sure not to mark your holes too low or too high. Too low and your jump ring will not clear the top of your leather. Too high and close to the edge could put you at risk for tearing your pieces off accidentally!

Once you've made your mark with the awl, you can punch a hole in each piece individually. Because you took the time to mark the pieces with the awl, these punched holes should all line up perfectly when stacked back together. After the holes have been punched with the Jewelry Punch, you can attach the jump ring.

Open your jump ring at the seam with your pliers. While the jump ring is open, feed it through the holes of each piece of leather. When you have all your pieces on the ring, you will close it back up with your pliers. After the ring is closed securely again, you can run your necklace chain through the ring and you now have a finished leather pendant necklace!


And that is all it takes to create a simple, genuine leather pendant necklace! Or, if you’re feeling particularly bold, a stacked earring. Do that exact process again and now you have a unique pair of earrings for yourself or to give as a gift!
This is a great DIY leather project for a craft night, or to keep the kids busy on a rainy afternoon. Are you going to make your own? Which of our beautiful leathers would you use? Tag us on Facebook or Instagram @theleatherguymn so we can see your spin on this project!
Unsure how to use some of the tools featured here? Be sure to check out our YouTube channel for some short tutorials with every tool we have listed!
Need some inspiration? Follow us on Pinterest for great DIY ideas, from no-sew to pro!
