

Make A Simple Valentine's Day Leather Gift Right Now
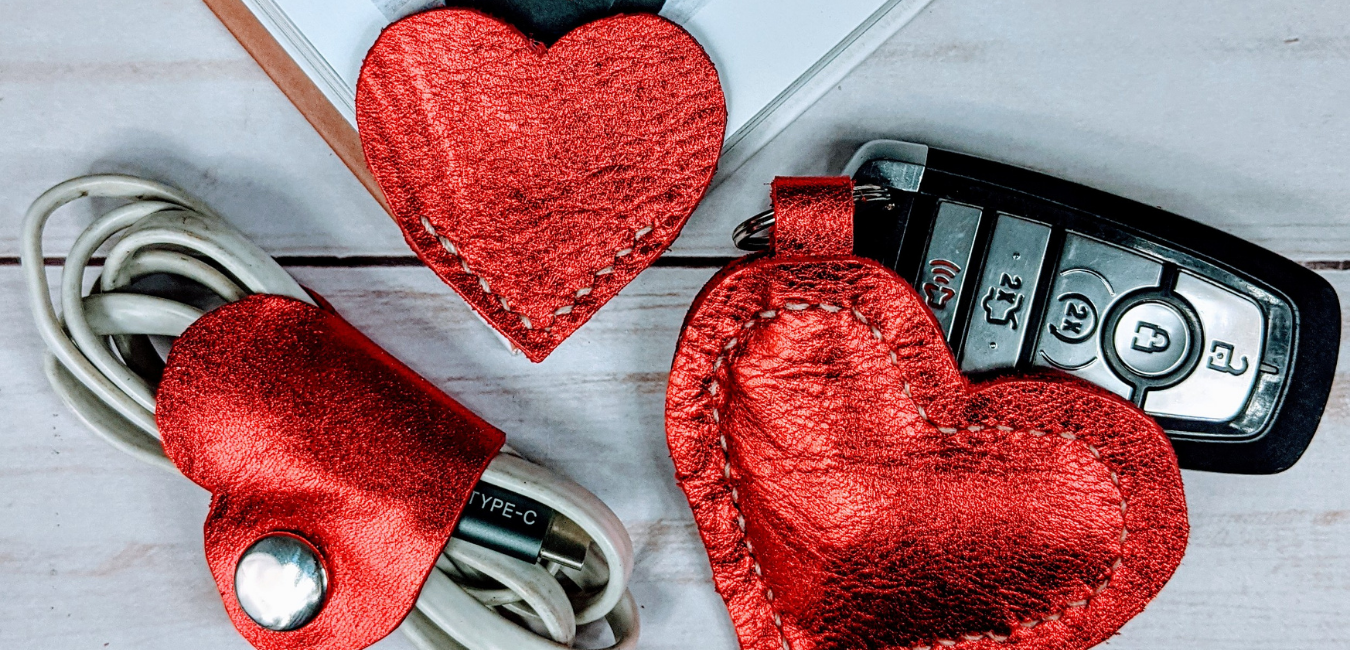
We’ve got not one, but three simple DIY valentine’s day crafts for you to choose from. Or make all three for a matching set!
These leather crafts are very simple and all three can be made in an afternoon. All you need is some scrap leather, a heart shape of your choosing, a few simple tools, and you’ll be on your way to a fun handcrafted gift just for your loved ones.
Cord Keeper

Tools Needed:
Leather (I used 3-4 oz Vegas leather, but this could be done with just about any leather)
Heart Shaped Template (draw your own or print one from online)

Let’s get those messy cords pulled together.
To start, draw your ideal heart shape, or print one from the internet. For the cord keeper, I made my heart about 2 inches tall.
Start cutting out your heart from the bottom point and up around the top curves. Stop when you reach the second straightaway.

You’ll want to fold over your heart against that straight line and trace it on the blank paper. Go ahead and start cutting out the traced image, being sure to leave the two hearts attached at the fold.
When you’re done, you will have two mirrored, but identical heart shapes joined in the middle. This is your cord keeper template.

Take this two hearted template, and lay it out on your leather. Cut around the template or trace it onto the leather (whichever is easier for you).
Take your scissors or your blade, and carefully cut out the rounded shapes, keep them as even as you can.

Now that you have the body of the cord keeper cut out, fold it in half and line up all the edges of the hearts as evenly as possible. While the leather is folded over, take your hole punch and set a hole about a quarter inch in from the edge.
You need these two holes to line up perfectly, so punching the leather while folded ensures that!

Unfold your leather and set your snaps. If you are unfamiliar with how to set a snap, please check out our short video showing you just how it’s done!
Be sure to set the finished sides of the hardware on the finished side of the leather. Otherwise when you snap it shut, you’ll be looking at the flesh side of the leather!

Once the snap is set, you have a finished cord keeper. Grab your charger or your ear buds, coil them up neatly, and snap the keeper around them.
Bookmark

Leather (we used 3-4 oz Vegas leather, but this could be done with just about any leather)
Harness Needles & Waxed/Polyester Thread

Save their spot for future reading!
With the bookmark, you can use the exact same size heart as you used for the cord keeper, or you can make it a bit larger!
In this case, we will be working with two independent heart shapes instead of a conjoined one.
Take your heart template and trace out two shapes on your leather. Take your scissors or blade and slowly cut around your hearts, keeping them as even as possible.
When they’re cut out, stack them on top of each, flesh side to flesh side. Apply your cement all along the v-shaped bottom of the hearts, but stop where the curves begin. The top of the heart is where the page of your book will slide into.
Allow the cement to dry. Depending on the adhesive you use, this could be 10-30 minutes. Once dry, you can move on to stitching!

If you are uncomfortable with hand stitching, you technically have a usable bookmark at this point. However, the stitching adds a nice finishing touch and ensures the strength of the bookmark for quite some time.
Take your stitching chisel and punch your stitching holes along the v-shaped bottom. Try to make it as straight as you can, creating a 90 degree angle for the page corner to rest in.
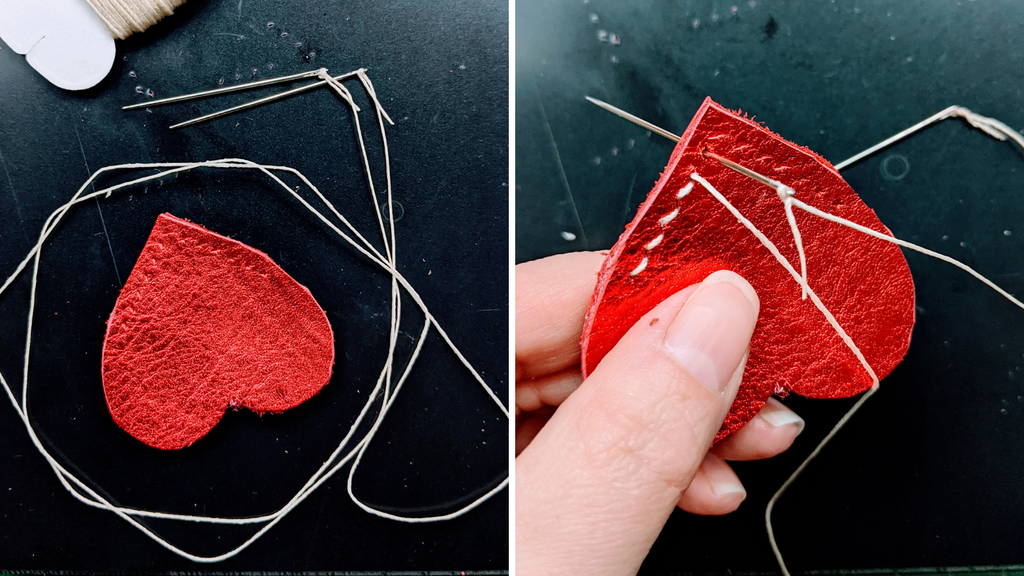
Here we will do a simple saddle stitch along the bottom where you chiseled your holes.
Cut a piece of thread about a 16inches long. Thread two needles onto either end of your waxed thread. Pull the thread evenly through the first hole (your needles should have equal length on both sides of the heart) and hold one needle with your left hand and one with your right.
Insert the left handed needle through the next hole and pull through. Once clear, place the right handed needle through the same hole, taking care not to pierce the thread. Pull both sides gently, but firmly, with even pressure.
That’s your first saddle stitch, and the exact pattern you will keep doing to the end of the chisel marks. 
To finish your stitching, simply reverse your direction and reverse stitch once or twice to seal the deal. Trim your thread, and using a lighter, very carefully melt down the excess so that it doesn’t come loose and has a clean, finished look.

And there you have a finished leather corner bookmark! Add initials, book quotes, favorite colors...the options are endless.
Key Chain

Leather (we used 3-4 oz Vegas leather, but this could be done with just about any leather)
Harness Needles & Waxed/Polyester Thread
Split Ring
 Make those keys easier to find in a handbag or backpack.
Much like the bookmark, you will need to trace two separate hearts onto your leather and slowly cut them out, as evenly as possible.

With both hearts cut out, you will need to stack them flesh side to flesh side, and begin applying your cement around the edges. Be sure to leave a small gap in the glue. We will be stuffing this heart and adding the loop for the split ring here shortly.
Allow the cement 10-30 minutes to dry. While you wait, cut up some of the smaller scrap pieces of leather you have laying around that may go in the trash. You can use this as the stuffing to give your key chain a more dimensional appearance.

When the glue is dry, start stuffing that tiny bits of scrap leather into the hole you left open. Use your pinky finger to push the stuffing all the way in and distribute it around the entire shape of the heart.
When you’re happy with how plush it looks, we can attach the hardware loop.

Take a small piece of leather, and cut a small strip about a quarter of an inch wide. The length is up to you, depending on how long of a loop you’d like.
Fold your strip around the split ring and adjust the length if needed. Apply a little cement to seal your loop.
Place that loop in the hole you put the stuffing through, and apply a little more cement to seal up the hole and the loop together. Allow time to dry.
Again, should you be uncomfortable with stitching, you have a finished key chain now. But the stitching works not only to ensure the longevity of the piece, but also enhances the look of the stuffing you added to the heart, making the heart look more three dimensional.

Should you want to stitch, the next step is to take your stitching chisels and work your way around the entire heart. You can use a larger chisel on the straightaways, but I suggest downsizing to a single or double prong chisel to achieve the curves.

Follow the same instructions as above (increasing your thread length if going with a larger heart than two inches tall) to complete your saddle stitching.
As you can see, the stitching really gives it a finished quality and emphasizes the shape as a whole.

And there you have it, three simple crafts that would make a sweet gift for Valentine’s Day, or anytime really. Make them in whatever colors or leathers you prefer. Experiment with shapes. Everything is open to interpretation!

We’d love to see them if you make them! Be sure to share them on social media and tag us @theleatherguymn.